Showing posts with label Recipes. Show all posts

Sunday, May 26, 2013

How I Made Brown Sugar Pound Cake


 This recipe was originally featured The Taste of The South's Southern Cakes Magazine, and I found it at Lady Behind the Curtain. I am giving the recipe here, since I made a few modifications. The original recipe is made in a 12-cup Bundt pan, but I knew that my little family would never finish a cake that large; and that means that I would feel OBLIGATED to eat it all, since I hate to waste. And we all know that eating an entire huge pound cake alone is no bueno for the waistline.


I cut the recipe in half and baked it in a loaf pan; I also left out the toffee bits that were called for because my hubs does not like toffee (I know...so, so weird!!!).

Ingredients:
3/4 cup softened butter
1 cup brown sugar
1/2 cup granulated sugar
2 eggs
1 1/2 cups flour
1/2 tsp. baking powder
1/4 tsp. salt
1/2 cup whole milk
1/2 cup chopped pecans

1 recipe Caramel Drizzle (find the recipe here)

Preheat oven to 325 degrees.  Spray a 8x8 loaf pan with nonstick baking spray with flour.  Set aside.
Beat the butter until creamy.  Add sugars, beating until fluffy.  Add eggs, one at a time, beating well after each addition.  In a medium bowl, combine flour, baking powder, and salt.  Gradually add flour mixture to butter mixture in thirds, alternately with milk, beginning and ending with flour mixture.  Beat until just combined.  Stir in pecans.  Spoon batter into prepared pan.  Bake until a wood pick inserted near the center of cake comes out clean (mine was ready in 70 minutes).  TIP:  Cover the top with foil to prevent excess browning is necessary.  Let cake cool in pan for 10 minutes.  Remove from pan, and let cool completely on a wire rack.  Spoon Caramel Drizzle over cooled cake. 


Even though I cut the recipe in half, I still made an entire batch of the Caramel Drizzle. :) Look. You can never, never have too much caramel....I used a little over half on the cake, and set the rest aside to use as ice cream topping. Yum, yum, yum.

Monday, May 6, 2013

How I Became Obsessed with Cilantro Salad


Ever wonder why you enjoy dining out so much more than dining in? Well, aside from the obvious...not having to cook, clean up, etc. :) I'll be honest, it's the clean-up that I dread every stinkin' time.

Restaurants just seem to add that little extra SOMETHING that kicks your experience up to the next level, though, don't they? And if they don't, you don't go back there. At least, I don't...my time and money are too hard to come by to waste on a mediocre experience, to my way of thinking.

Our favorite Mexican restaurant in town JUST DOES IT. Everything is just right, somehow. My go-to menu item is the Brisket Tacos. They are so fresh and fantastic that just the thought of them makes me mouth water. Yep, it's watering right now.  They serve them with this fresh cilantro salad on the side, and let me tell you....that cilantro salad makes that dish.

So a couple of weeks ago, I was making pulled chicken tacos, and thought I'd try my hand at the salad. I'm calling it a "salad" because I'm not sure what else to call it! It's not exactly a salsa, I don't think. Well, it turned out amazing. So amazing that I have made chicken tacos and steak tacos multiples times since then, just so I could make this salad to go with it.

And of course I just had to share it with you. It's so easy that it almost seems silly to brag on it, but I'm going to anyway.

Cilantro Salad
Equal parts cilantro and chopped onion
Juice of one lime

I put the three ingredients into my Ninja and just let it whirl for a bit.

The brightness of the cilantro and lime just make the tacos so tasty and fresh.

Ooooooooh, I'll bet it would be so good on enchiladas, too! And maybe tostadas...or baked chimis...

Linked up to Watch Out, Martha!

Tuesday, March 19, 2013

How I Made a Chalkboard (Or a Before and After)


This is a not-so-good shot of a large framed print that we had sitting in our garage.  It's a fairly large piece, so it looks quite substantial hanging on the wall, but it's definitely not my taste. I had been dying to paint something with chalkboard paint for quite a long time, and when I found chalkboard spray paint on clearance for $3 (not a huge savings, since the regular price is $4, but just seeing the clearance sticker made me feel good about it), I knew my time had come.

Originally, my plan was to get gold epoxy from Hob Lob and distress this frame, but once I sprayed it with the chalkboard paint, the frame really came into its own. I decided to leave it as-is. How serendipitous. :)


I shamelessly copied the text from a painted canvas that I saw on Etsy. It was all blues and whites and yellows and I loved it, so this is my version. Not too bad for a $3 art project, I thought. And I still have plenty of paint in the can. What to do, what to do....

Linked up to The Shabby Creek Cottage

Wednesday, February 20, 2013

How I Make Homemade Break-n-Bake Cookies

Recently, the young women at my church got together to bake cookies to take to some of our widows for Valentine's Day; the idea was that each of the older women would not feel alone on a day that's meant to celebrate love and togetherness. We were each asked to brink either a package of brownie mix or a package of break-n-bake refrigerated cookies to bake and then package.

You already know that I'm not a huge fan of pre-packaged foods; while I'm not opposed to using them in a pinch, if I don't have to, I won't.

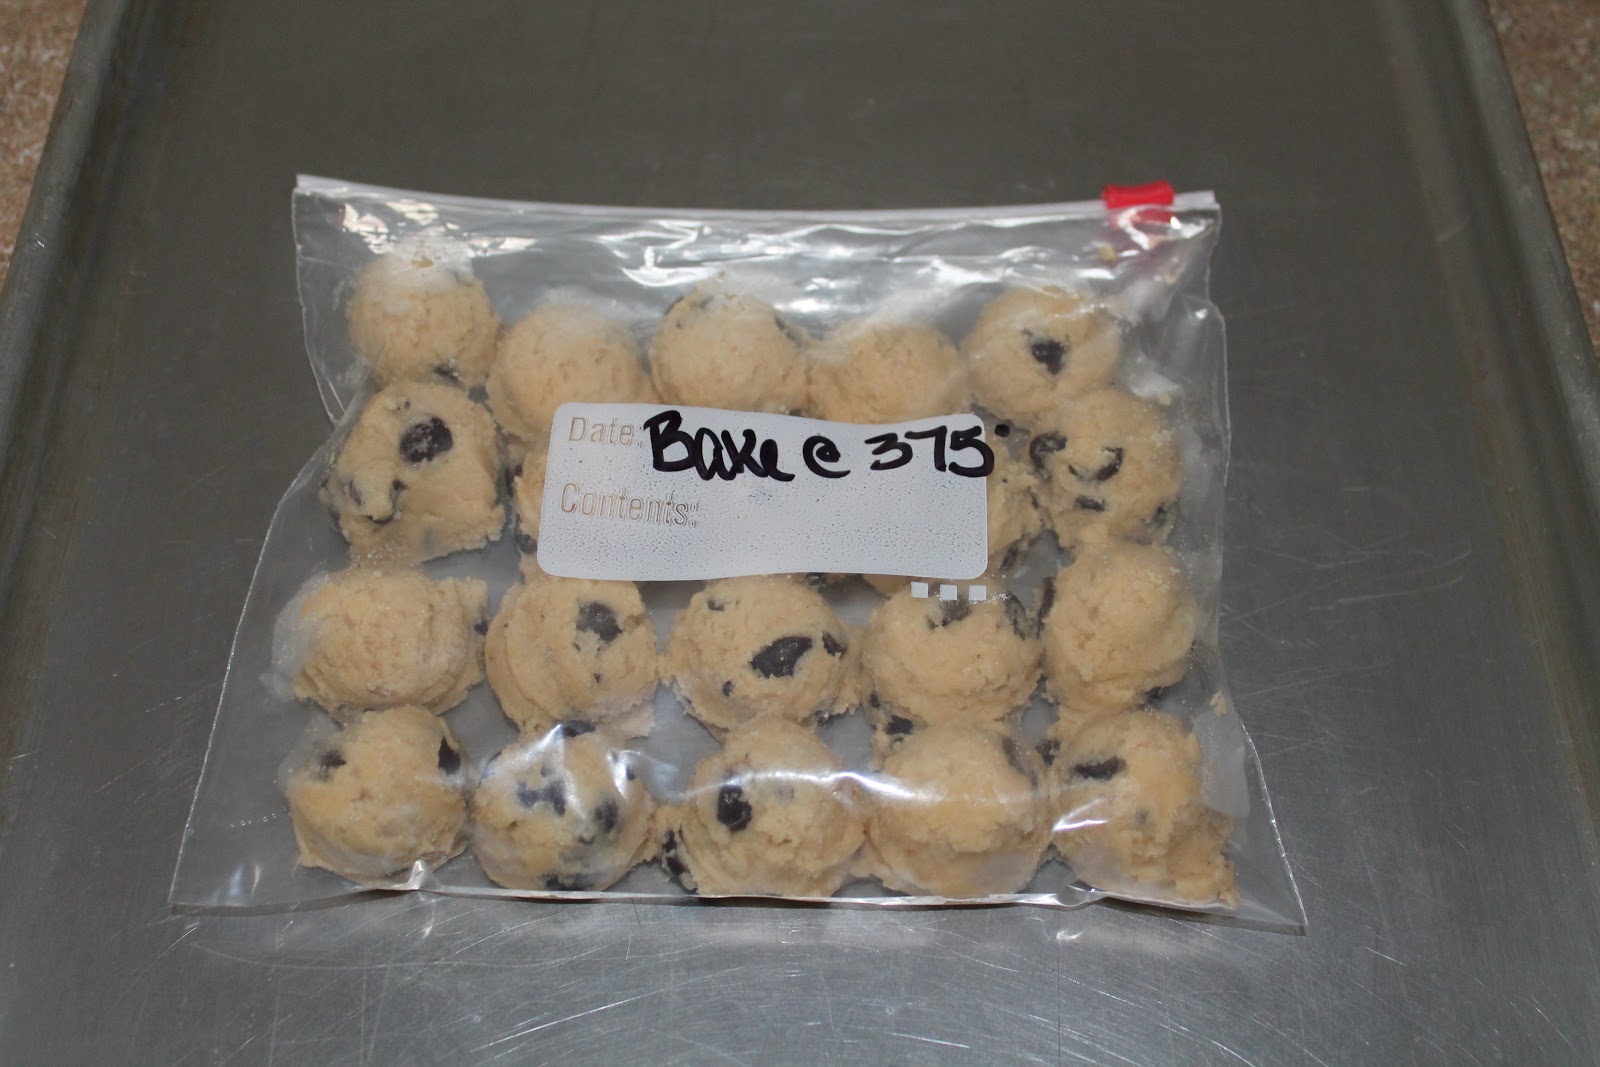
So I decided to just make my own cookie dough, freeze it, and take it to the party.

My cookie dough recipe is the one that I grew up with, the one from my mom's huge orange Betty Crocker cookbook. Sometimes, you just don't need to mess with fixing what's not broken.

I mixed up the dough, then I used my Pampered Chef scoop to divvy them up on a cookie sheet lined with waxed paper.


I put them in the freezer for about 30 minutes, then put them in Ziploc bags and labeled them.


How I Made Country BBQ Nachos

This is another one of those I-need-to-get-some-kind-of-meal-on-the-table-ASAP dinners. It's so easy and quick and crowd-pleasing! I think I originally saw this recipe in a Schwann's catalog a million years ago, and just adapted it to our family's taste.

You will need:
Tortilla Chips
Some kind of BBQ meat (I used chicken, but it's really good with pork or beef as well)
Frozen Corn
Black Beans, drained and rinsed
Cream Cheese (I used 2 oz)
Ranch Dressing
BBQ Sauce
Shredded Cheese (I used a Mexican blend simply because that's what I had on-hand)

On a large cookie sheet, lay down a layer of tortilla chips and BBQ meat....

....a layer of frozen corn and black beans (I used about 1/4 pkg. of corn and half a can of beans)...


....a layer of cubed cream cheese (you can put as little or as much as you like...my family likes me to take it easy on the cream cheese).....


....and then squizzle on some Ranch dressing and BBQ sauce......


....and lastly, sprinkle on the cheese.


Put it in a 350-degree oven until the cheese melts (about 15 minutes in my oven).


I'm not going to pretend like this is the healthiest dinner.


Or even a moderately healthy one.


But homemade fast food beats a fast-food-chain "dinner." Every. Single. Time.

Monday, December 17, 2012

How I Made a Rosette Necklace


I had someone ask me a while ago for a tutorial on a hot pink rosette necklace that I made...it's taken me a while to get this one up and going, but here it is!


1. I made 5 fabric rosettes.

2. I laid them out in the pattern I wanted on a piece of felt, traced around it, and cut the felt out.

3. I hot-glued the rosettes to the felt backing.

4. I cut two equal lengths of chain (you can buy the chain on a roll like this at Hobby Lobby for around $5...I have made at least four different types of necklaces out of it at this point, and still have plenty left!).

5. To one end of each piece of chain, I attached a jump ring. To one of the jump rings, I attached a lobster claw closure.


6. To attach the chain on each side of the necklace, I pulled the felt backing away from the rosette, put in a drop of hot glue, and sandwiched the chain in between the felt and the fabric.

That's it! See how it looks in an outfit here.

Sunday, December 9, 2012

How I Made Almond Shortbread (Or I May Never Leave My Kitchen Again)


Oh. My. Hannah.

I saw this Almond Shortbread on an episode of Trisha's Southern Kitchen a couple of weeks ago, and I absolutely had to make it. And it is beyond worth it. Please, for the love...you have to try this.

Almond Shortbread
  • Nonstick cooking spray
  • 1 1/2 cups plus 2 tablespoons sugar
  • 3/4 cup (1 1/2 sticks) butter, melted
  • 2 large eggs
  • 1 1/2 cups all-purpose flour
  • 1/2 teaspoon salt
  • 1 teaspoon almond extract
  • 1/2 cup sliced almonds with skins


Preheat the oven to 350 degrees F. Line a 10-inch cast-iron skillet with aluminum foil and spray the foil with cooking spray.

In a large mixing bowl, stir 1 1/2 cups of the sugar into the melted butter. Beat in the eggs one at a time. Sift the flour and salt onto the batter. Add the flavoring and stir well. Pour the batter into the skillet. Top with sliced almonds and the remaining 2 tablespoons sugar. Bake until slightly brown on top, about 35 minutes. Cool the shortbread in the skillet. When cool, use the foil to lift the shortbread from the skillet; remove the foil before serving.

I've never posted a recipe that I hadn't changed up in some way, but this one is so amazing just the way it is. So. Amazing.
Linked up to Petite Hermine

Thursday, December 6, 2012

How I Made My Version of Pork Pie


So yesterday, while running my booty off on the treadmill, I happened to catch part of an episode of The Chew. You may think that it's counter-productive to watch food-related television (sometimes I entertain myself with a little Paula Deen) while exercising, but it works for me. I run to support my eating habit.

Just kidding.

Kind of.

The dish of the day was Pork Pie, offered by none other than Michael Symon (who else???). It looked so tasty, and I happened to have some pork products in my freezer, so I thought I'd riff on his pie a little bit. (You can find his version here.) He includes flavors in his that I'm sure are amazing, but  would never make it past my family.

Pork Pie
3 links of Italian sausage, removed from casings and browned
1/2 lb. ham, cubed
4 medium potatoes, peeled and cubed
1/4 of an onion, chopped finely
bacon, cooked and crumbled (to taste)
1 cup sharp cheddar
1 cup water
1 tsp. minced garlic
1/2 tsp. celery salt

I put all of this into a stock pot and let it simmer. Symon said that the potatoes should only get to the point of being al dente; I brought it all to a boil and then reduced the heat for about 30 minutes.

After preheated my oven to 450 degrees, I made my pat-in-the-pan pie crust in my cast-iron skillet, and baked it for 10 minutes. Then I pulled the skillet out and put the pork filling in it.


I made a second crust using the same recipe as the first; the only difference is that the second time, I actually formed it into a ball and rolled it out on a floured countertop. (*If the dough is too wet, just add a little flour.) This went on top of the filling, and got an egg wash and some slits in the top to let the steam escape.


I heard someone once say that if something isn't pretty, we just say that it's "rustic." So here's my rustic pork pie, about to go into the oven.

It baked for 15 more minutes at 450. It came out looking like this:


We ate it along with a Caesar salad (my hubby's favorite).

A lot of times, we only think of pies as dessert, but savory pies are so tasty and a great option for cooking on a budget. This is a warm, filling, comforting meal.

Linked up to Delightful Order Thirty Handmade Days Walking On Sunshine

Friday, November 23, 2012

How I Made Round Steak with Gravy and Potatoes (Or Shove it in the Crock Pot!)


Oh. My. Goodness.

So this Thanksgiving, it was our turn to host. I don't know how that works out for everyone else, but in my house, it translates to days (and days) of prep. It's like all the dirt in the world congregates in my house and needs attention as soon as I make plans to have people over. I run out of time to cook, but funny thing is, my family still needs to eat regardless of whether I feel like I have time to feed them. Does that happen to anyone else?

This meal was a lifesaver the day before Thanksgiving when I knew I'd be pressed for time and unwilling to make a big mess while cooking.. Earlier this year, we split a cow with my mother-in-law and sister-in-law; we got so spoiled, since there was always meat in the freezer....and we're talking hamburger, roasts, and the best cuts of steak. See? Spoiled rotten.

Naturally, when you get a whole cow, you get the lesser cuts as well. My husband's favorite meal is chicken fried steak, and while I'll make that upon request, I don't like to do a whole lot of frying. I had a couple of packages of round steak still in the freezer and wanted to find a different way to prepare them.

I looked up some slow-cooker recipes online, but each one that I found called for a condensed cream soup. I think I've mentioned before that I'm not a huge fan of convenience foods, for a variety of reasons. I'm becoming very uncomfortable with the thought of all the preservatives and chemicals that we put in our bodies, and while I'm not making the leap into exclusively "real food" territory (let's be honest here...I love me some Oreos), I do try to make as many things from scratch as possible. I've gotten to the point that I can taste the preservatives in a lot of prepared foods, and it makes my stomach turn. Once again...I'm not a complete health nut! Just a moderate health nut. :P And finally, cooking well (and eating well) on a tight budget usually requires cooking from scratch. It doesn't really take all that much more time once you get the hang of it, either. It's totally worth investing the time to learn.

I wasn't sure how my children would enjoy this meal, because they do not (DO NOT) like anything with gravy, typically. But they, along with my husband, went back for seconds, and not one bit was left over.

Slow-Cooker Round Steak with Gravy and Potatoes

1 package (maybe 4 good-sized?) steaks
4 cups beef broth
1/4 cup flour
1 tsp. seasoned salt
1 tsp. garlic
1/2 tsp. paprika
Splash of vinegar
6 medium poatoes, peeled and cut into thirds

In a separate bowl, whisk together 1/4 cup beef broth and 1/4 cup flour. Pour this mixture into the slow cooker, use a whisk to combine with the other 3 3/4 cups beef broth, and sprinkle in the seasonings and the vinegar. Put the round steak in along with the potatoes, and cook on high for 4 hours.

Linked up to Kitchen Fun with My 3 Sons Six Sisters' Stuff Petite Hermine

Saturday, November 10, 2012

How I Made Mammaw's Black Magic Cake (Or I Can't Make a Pretty Cake to Save My Life)


When my oldest son turned 1 (6 years ago now), my Mammaw came up from her small town in Southern Missouri to celebrate with us. She brought with her a Black Magic cake for him to have for his first birthday cake....we set out his high chair in the middle of the room, and spread newspaper underneath it to catch all the crumbs that we were sure would fall to the ground; but that child literally used his finger to wipe up and lick every crumb and speck of frosting off of his tray. He completely waxed it! And ever since then, it's been a tradition to have a Black Magic cake for a first birthday in my family.

Today, we are celebrating my youngest daughter's 1st birthday. I cannot even believe that she is getting that old...any mom will say that the time absolutely flies by. My mother sang this song to us, and now I sing it to my children:

Where are you going, my little one, little one?
Where are you going, my baby, my own?
Turn around, and you're tiny,
Turn around, and you're grown,
Turn around, and you're a woman with babes of your own.

Yes, I'm crying.

On to the cake.

Black Magic Cake:
2 eggs
1 cup strong black coffee (or 1 cup boiling water and 2 tsp. instant coffee
1 cup buttermilk
1 tsp. vanilla

Mix well and add dry ingredients listed below:

1 3/4 cups flour
2 cups sugar
3/4 cup cocoa
2 tsp. baking soda
1 tsp. baking powder
1 tsp. salt

Pour batter (it will be thin) into greased 9x13 pan (I used 2 round cake pans). Bake at 350 degrees for 35-40 minutes.

I'm not much of a frosting person, but I LOVE ganache, so I made a whipped ganache frosting for this cake. It's AMAZING.

1 cup whipping cream
9 oz. chocolate (I used semisweet chocolate chips)

Set the chocolate in a heat-safe bowl; then in a saucepan, heat the whipping cream until just before it reaches a boil. Pour the hot cream over the chocolate and mix until it all melts together. Holy cow.

Once this mixture cools and thickens, whip it until it reaches a frosting-like consistency. This is SO EASY, I promise you!


Now, I'm more of a pie person than a cake person, and I cannot make a cake pretty for anything!!!! I don't know if it's because I lack the skill, or because I lack the patience, or if it's a deadly combination of both. I have just decided that there are people who can ice a cake well, and people who can't. Apparently I'm one of the ones who can't. Which is yet another reason to stick with pie, in my opinion.

It stinks that in my family, I'm the only one who really appreciates a good birthday pie.

I'll let you know how my baby enjoys her first birthday cake. :)

 
This post is linked up to Six Sisters' Stuff Sumo's Sweet Stuff Making the World Cuter Skip To My
 

Wednesday, November 7, 2012

How I Make BBQ Chicken Baked Potatoes


If ever there was an easy dinner, this one has to be it.

When my husband and I were in college, the pizza place down the road made a variety of loaded baked potatoes, and we ate our weight in them. It's not a difficult concept, is it? Take a potato, fill it with whatever makes your heart happy, top it with gooey melted cheese, and you have a no-brainer budget item for dinner. We've been making them at home ever since we graduated from college.

I start by baking my potatoes in my Crock Pot. Have you tried this yet? I wash them, prick them with a knife, turn the Crock Pot on high, and let it go for four hours or so. They turn out perfectly every. Single. Time. I do put a little water in the bottom, although I've heard that's not necessary. I figure I'd rather be safe than sorry. I also "bake" more potatoes than I need for this meal while I'm at it...tomorrow's dinner is supposed to be Cheesy Sausage Potato Soup, so I might as well have the potatoes ready to go beforehand.

About 30-45 minutes before it's time to eat, I'll go ahead and cook my chicken breasts. One tip that I've found to work well is to splash a little vinegar into the water that I'll boil the chicken in; it helps tenderize the meat and make it easier to shred (I also do this with pork and beef). Once the chicken is cooked, I'll shred it and mix barbecue sauce in.

Then I pull the baked potatoes out, and using a fork, I'll pull the insides away from the skin. Then I'll butter and salt them...

..and top them with the barbecue chicken and cheese. I'll pop them into the microwave just long enough to melt the cheese.

My husband is a big fan of hot wings, so sometimes I mix some Frank's Red Hot in with his chicken and let him have a Buffalo Chicken Baked Potato. This is another one of those dinners that can go as far as your imagination takes you...you could make a veggie potato, or an Italian one (with Italian sausage, pepperoni, and salami), or you could use ham, pulled pork, bacon...really, the possiblities are endless. Serve it with a green salad and a crusty loaf of bread and you have a perfect, easy fall dinner.

Linked up to Someday Crafts Sugar and Dots Raising Homemakers Handy Man, Crafty Woman Yesterday On Tuesday Cindy's Recipes and Writing

Monday, November 5, 2012

How I Made a Rustic Flag

A couple of years ago, when I first discovered blogs (how IS it that I was so late to the party???), of the first blogs that I fell in love with was The Lettered Cottage. I just loved absolutely-stinking-everything about her taste and style. She does the kinds of things that I would think I'd like to do if I had the time, energy, money...okay, if I had the patience and stick-to-it-iveness to tackle projects that take longer than a naptime to finish.

She did a series on decorating mantles for different seasons, and while I didn't (and still don't) have a mantle, this rustic, beach-inspired flag caught my eye instantly.

I had to make something like it for myself, and this is what I came up with.


I bought six picket-fence boards from Lowe's (I think they were around $1.24 apiece), cut them down (by hand!) to a size that I felt would work, and then painted them all red. Then I painted over each one with paint that I already had on hand from other projects, and painted the metal star that had been given to me red as well. I distressed them just by rubbing over the boards with steel wool...the steel wool actually left a little bit of a gray tone behind, which wasn't what I was going for, but worked out well for me! They are fastened together on the underside by two small boards that run from top to bottom (I nailed the fence boards to the small boards).


Linked up to The Brass Apple Mad In Crafts Project Inspire Coastal CharmYesterday on Tuesday

Thursday, November 1, 2012

How I Make Pie Crust (Or You Don't Need a Rolling Pin)

I try to avoid convenience foods whenever possible. It irritates me to spend more than  I need to on anything, especially when I'm convinced that I can do or make whatever-it-is at least as well as the store-bought version, and usually I feel like I can make or do it better. Sometimes I don't have any confidence issues.

Anytime you see a recipe that calls for a pie crust -- and especially a store-bought one-- please, for the love, try this recipe before you reach for anything off the shelf or out of the freezer!!! Your body may thank you for not pickling it with a ton of preservatives and ingredients that you can't even pronounce. It may not thank you for falling off the diet wagon, but that's a totally different story anyway....

You need:
1 1/2 cups flour
1/2 cup oil
3 TBSP milk (or a splash more if your crust is too dry)
1/2 tsp. salt
pie plate

Dump all of the ingredients into the pie plate willy-nilly.....


...use a fork to mix it all together...


...(it should look something like this)...


...and then, using your fingers, press the dough into the plate to form the crust, and prick the bottom with the fork.


Obviously, I don't worry about whether or not it's Better-Homes-and-Gardens pretty or Martha-Stewart perfect. To me, some battles are worth fighting and some just aren't.

At this point, you could bake it at 350 degrees for about 10 minutes or until it's golden (I always have to keep checking it...my oven is not fabulous).

Or you could fill it...this one is a yummy fudge pie...


...and bake according to the recipe.


Almost looks good enough to eat, doesn't it?

I've been making pie crust using this recipe since i was a teenager. The first time I ever made a pie for my Mammaw, she took a bite, looked at me, and asked if I made my own crust. "Yes, ma'am!" She picked her fork back up, resumed eating, and said, "It's not everybody that can make a good pie crust."

Now, if an Ozarks-born-and-raised Mammaw tells you that you make a good pie crust, you'd better believe it's true. Mammaw didn't "tell stories."

This post is linked to House of Hepworths Don't Waste Your Homemaking Thrifty 101 What's Cooking Love? Here Comes the Sun Skip To My Lou Cindy's Recipes and Writing

Saturday, October 27, 2012

How I Made Cinnamon Biscuits (Or a Stitch In Time Saves Nine)

Some of you are old enough to remember the old Hardees' Cinnamon Raising Biscuits. Do you remember how everyone went nuts collecting the Cinnamon Raisin figurines?

If you don't remember that, please keep it to yourself. I just realized that I dated myself. Terribly.

Well, since I grew up in a family of 6 kids, going "out to eat," for fast food or dine-in, didn't happen all that often. So my mother would make Cinnamon Raisin Biscuits from scratch. And frankly, they tasted much better than Hardees'.

I was feeling nostalgic this morning.

I made a double-batch of biscuit dough:

2 sticks of butter
6 cups flour
2 tsp. salt
6 tsp. baking powder
2 cups milk (may need more if your dough is dry)

I'll explain why I made a double-batch in a minute. That's the "stitch in time" part.

I mixed the butter and the dry ingredients until pea-sized lumps of dough were formed. Then I incorporated the milk.

I did all of this in my Kitchen-Aid, and let it do the work using the dough hook. I let it run for a couple of minutes.

I preheated my oven to 450 degrees, and put my cast-iron skillet in the oven to heat up, as well.

After I had done all of the above, I took half of the dough and rolled it out....


....sprinkled it with cinnamon and brown sugar....


....folded the sides in and rolled it out again...


...sprinkled it again with cinnamon and brown sugar...


...folded the sides in, turned it seam-side down, rolled it out to flatten just a little bit, and cut out the biscuits.


See the ribbons of cinnamon and brown sugar? Ah, yes.

 Then I put the biscuits in the pre-heated cast-iron skillet. The pre-heated skillet will give  a crispy bottom crust...I love hearing the sizzle when the buttery biscuit dough hits the pan.


I heard once that in order for biscuits to rise properly, they have to bake touching each other. I don't know why. I just do it.

I baked this at 450 for about 12 minutes, or until golden on top.


As soon as they came out of the oven, I poured a glaze of melted butter and powdered sugar over the top. I love how the hot skillet makes the sugar crystalize and gives a beautiful crispy sheen over the biscuits, and the heat helps them soak up the buttery sugar. Or the sugary butter. Either way, it's win-win.


That's not a bad way to kick off a Saturday morning.

Now for the "stitch in time" part.

I first came across the idea of homemade frozen biscuits here. Pure genius.

I doubled my batch of biscuit dough to make some to freeze. While my Cinnamon Biscuits were in the oven, I rolled out the second batch, cut them out, put them on a cookie sheet lined with waxed paper, and put them in the freezer for about 30 minutes.


After they were frozen, I pulled them out, put them in a freezer-safe bag, and labeled them.


The extra 7-10 minutes it took to roll out a second batch will save me so much time later, and homemade frozen biscuits are literally a fraction of the cost of purchased ones. So we have fresh biscuits today and frozen ones for another, busier day.

Linked up to Six Sisters' Stuff Be Different Act Normal TaterTots and Jello Positively Splendid I Heart Naptime DIY Showoff Nifty Thrifty Things Petite Hermine Make Ahead Meals for Busy Moms Flour Me With Love